My current blog was previously hosted on Godaddy WordPress Hosting and it was due for renewal. From work, I knew about Amazon Lightsail and thought it would be nice for me to migrate my current WordPress blog to Amazon Ligtsail for the below reasons.
- Amazon Lightsail is provided at a competitive cost and cheaper than my current Godaddy hosting
- It comes with free static IP and DNS Zone manager
- UX is superior and easier to upgrade plans
Convenient CDN which can be attached easily - Use of LetsEncrypt SSL Certs, which wasn’t able to do with Godaddy
I followed the official article from AWS documentation to migrate my blog which can be summarised as follows,
Step 1: Export the current blog from the WordPress dashboard and save the xml file
Step 2: Create a Lightsail instance which suits your need, I went for the basic Linux Virtual server which starts at $3.50 USD/mo
Step 3: Walkthrough the UI to install the appropriate software, in my case, it was WordPress (It uses the Bitnami wordpress release)
Step 4: Once the instance is up, connect using the SSH from browser and copy the password and then login to the new WordPress admin panel to import the file exported before.
For the step by step guide, follow the instructions here
Step 5: Enable SSL certificate using the official Bitnami guide
Lightsail using CDK
If you're not sure what are the settings and features to enable in lightsail continue reading how to use AWS CDK (AWS Cloud Development Kit) to setup a Lightsail instance. Before we begin, if you're not familiar with CDK, I would highly recommend you to go through this workshop to learn about CDK.
CDK and CloudFormation
CDK (CDK uses CloudFormation in the background)doesn't have any L2 constructs for Lightsail, hence we have to rely on the L1 constructs which is sames as the AWS CloudFormation scripts.
We need a bunch of properties that we need to provide as an input for the Lightsail instance. Lightsail comes with pre-packaged softwares called blueprints. Some of them AWS provided and rest are AWS partners provided. The blueprints can be just an operating system or a fully functional software like wordpress. Run the following AWS CLI commands to get the necessary details.
List of blueprints - aws lightsail get-blueprints. I chose wordpress
List of pricing bundles- aws lightsail get-bundles. I chose nano_2_0
Next we create the Lightsail insance using the CDK construct CfnInstance
    const instanceProps: CfnInstanceProps = {
      availabilityZone: 'us-east-2a',
      blueprintId: 'wordpress',
      bundleId: 'nano_2_0',
      instanceName: 'Lightsail-Wordpress-blog',
      addOns: [addOnProperty],
      tags: [nameTag,craetedByTag]
    }

    const instance = new CfnInstance(this, 'MyLightSailInstance',instanceProps)
 ```

Next step is to create a static IP for our instance so we can attach our domain name to it.

```typescript
    const cfnStaticIpProps: CfnStaticIpProps = {
      staticIpName: 'MyLightSailWordpressIP',
    };
    const cfnStaticIp = new CfnStaticIp(this, 'MyLightSailWordpressIP', cfnStaticIpProps);
Next step is to do cdk bootstrap to create the CDK CloudFormation toolkit in your AWS account and then deploy the stack using cdk deploy and the stack must be deployed in a few mins. We have to attach the static IP to the instance manually in this way.
To clean up the resources, use the cdk destroy command to clear all the resources created.
There is not much else you can really do with CDK to create Lightsail instances as of today. I believe it could be still developement and there are some constructs available in CloudFormation are not available as well. For example: AWS::Lightsail::Distribution. I will try continue to update this section as more constructs are released.
CDK and Terraform
CDK works also Hashicorp's Terraform through dedicated library called CDKTF or Terraform CDK. The output of the synthesize is terraform when you use this library instead of CloudFormation templates. At the time of writing this blog post, CDKTF is in beta and are not production ready.
To get started follow the official guide here to install the necessary libraries and get familiar with it.
Intialize the CDK project using cdktf init --template=typescript --local which will save the terraform state locally and then install AWS provider pacakge using npm install @cdktf/provider-aws
Creating an instance is very similar to CDK
const instanceConfig: LightsailInstanceConfig = {
availabilityZone: "us-east-2a",
blueprintId: "wordpress",
bundleId: "nano_2_0",
name: "Lightsail-Wordpress-blog",
keyPairName: instanceKeyPair.name,
tags,
};
const instance = new lightsail.LightsailInstance(
this,
"MyLightSailWordpress",
instanceConfig
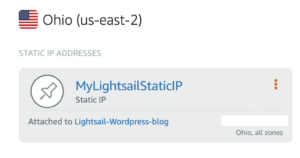
);Unlike the CDK we can actually attach the static IP that we create to the instance itself. For the complete source code, refer the Github link at the end of the blog.
const staticIPAttachement = new lightsail.LightsailStaticIpAttachment(
this,
"MyLightsailStaticIpAttachment",
{
staticIpName: staticIP.name,
instanceName: instance.name,
}
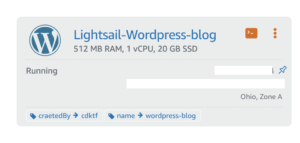
);Once it is added run cdktf deploy to deploy the stack and it must deploy four resources. And you can verify the same in the Lightsail console in your AWS account.
Cleanup
If you're following this post to experiment and wants to clean up the created the resource, navigate to the respective CDK directories then run cdk destroy or cdktf destroy. Also make sure there are no other resources created by checking in the Lightsail console.
Conclusion
In this blog post, we have seen how to use CDK and CDKTF to deploy Amazon Lightsail instance. Although the options provided by these IaaC scripts are limited, Lightsail itself is very powerful and simple. We can run containers, run 3-tier application, attach a CDN all from the Lightsail console itself.
Please find the full source code in the Github Repository